
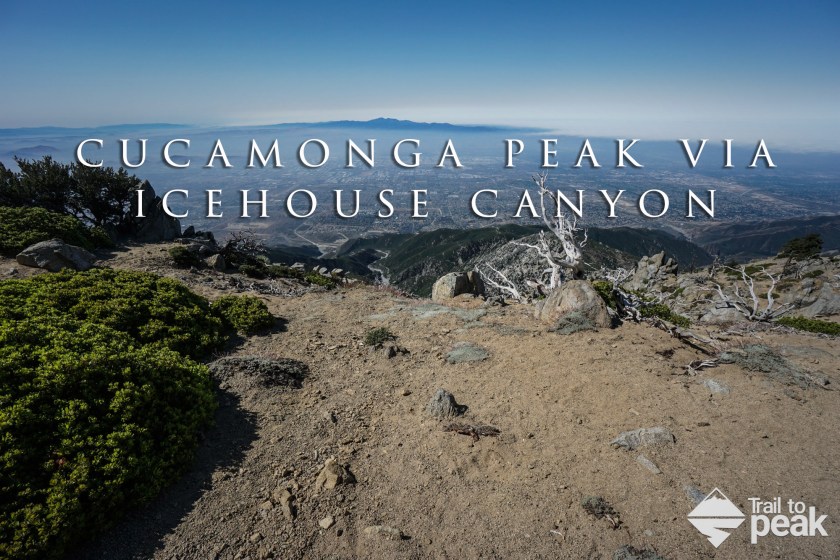
Cucamonga Peak via the Icehouse Canyon Trail is a 12 mile out-and-back hike that gains 4,339ft with a max elevation of 8,858ft. Located in the Cucamonga Wilderness of the San Bernardino National Forest, Cucamonga Peak sits in the front range of the San Gabriel Mountains. Although Mt. Baldy is the most well known peak in the San Gabriels, Cucamonga Peak is known for commanding the best views. In this guide, I will include directions, maps, a GPS Track, photos, and a detailed hike description.
Directions And GPS Tracks:
- The trailhead to hike Cucamonga Peak via the Icehouse Canyon Trail is located at the Icehouse Canyon parking lot. Click here for directions
- From the 210 freeway, exit Baseline (eastbound) or Mountain (westbound) and head north towards Mt. Baldy Road and Mt. Baldy Village. Continue past Mt. Baldy Village for around 2 miles until you reach a fork. You’ll see the parking lot for Icehouse Canyon on the right leg of the fork.
- Download GPX
- See track on Gaia GPS

Key Points:
- Distance: 12 miles
- Elevation Gain: 4339 ft
- Minimum Elevation: 5105 ft
- Maximum Elevation: 8858 ft
- Time: 5-9 hours
- Difficulty: (3.5/5)
- Dog Friendly: Yes
- Permit Required: No, but an Adventure Pass is required to park at Icehouse Canyon Trailhead
- Parking: There is a small parking lot at the trailhead, but it fills up by 6:30 AM on most weekends. Additional parking is available along the road. Be prepared to walk upwards of 1 additional mile if you arrive later than 8:00 AM.
- Trail Condition: This is a steep trail of single track that is very rock over the first 3.5 miles. There are a few very small water crossings. The trail runs alongside a creek and is very shaded for the first 3.5 miles. This water can lead to bugs, so come prepared if you’re averse. The final 2.5 miles is exposed, so make sure to have good sun protection. There is dangerous ice and snow on this trail in the winter, with conditions that can be very treacherous without proper gear and training.
- Cell Phone Reception: Almost none. I will sometimes get service after the Icehouse Saddle and/or at the summit of Cucamonga Peak.
Make sure to hike with the right gear. See my current hiking gear list.
Hike Map And Elevation Profile:


Hike Description:
0.0 Miles (5105ft)- At the Icehouse Canyon trailhead, you’ll find a restroom with pit toilets and trashcans. Continue up the road and you’ll see the start of the trail.


The trail starts out pretty level, but be prepared, it will start gaining elevation quickly. The first mile of hiking will take you by a series of occupied cabins, as well as the abandoned foundations of others.


0.5 Miles (5302ft)- The trail will begin climbing in earnest here, so hopefully your legs are nice and warmed up. This is also where the trail becomes quite rocky, so make sure to wear proper footwear. If you try to hike this trail in standard running shoes, your feet will take a pounding.


Depending on the year and season, the water can be flowing quite quickly through Icehouse Canyon. Many visit just to picnic alongside these waters. There are numerous use-trails that lead down to the water, and a few sections of trail that will walk you right up to the banks. The are a few parts of the main trail that get intersected by feeder streams. Make sure to be mindful of your footing here, as the stepping stones can be slick.


1.0 Miles (5629ft)- After hiking for one mile, you’ll reach a junction for the Chapman Trail. This trail veers off to the left and takes hikers on a more scenic route to the Icehouse Saddle. Stay straight ahead to continue on the main trail.


1.6 Miles (5956ft)- At this point on the trail, you’ll cross over from the left side of the canyon to the right side of the canyon. You’ll notice a change in scenery, too, as the lush green landscape gives way to much more granite.

1.8 Miles (6078ft)- You’ll pass into the Cucamonga Wilderness. You’ll see a sign on your left with rules and regulations for the wilderness area.


This next stretch of trail can change from year to year, as it gets reshaped by every passing flash flood. Heavy rain can move these granite slabs around pretty quickly. It’s pretty easy to follow, but make sure to pay attention.

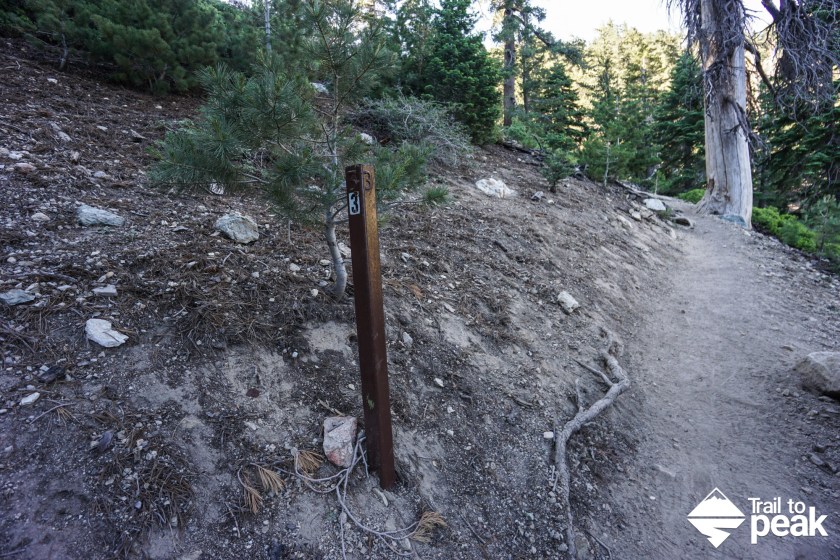
2.0 Miles (6279ft)- After passing the metal post signifying the two mile mark, you’ll hit a long stretch of uphill hiking. This singletrack is smooth and buffed out, which makes for some really nice hiking.


2.6 Miles (6645ft)- If you are camping in this area or are hoping to filter water, you’ll find a spring just off of the right hand side of the trail here. This spring is seasonal, so make sure to check ahead and don’t plan on there being water here without confirmation.
After leaving the spring behind, the trail turns into a series of switchbacks. You’ll be treated to some pretty nice views of Mt. Baldy as you gain in elevation.


2.9 Miles (7114ft)- Just before reaching the 3-mile mark you’ll see the end of the Chapman Trail at a junction. This is the trail offshoot that started back at the 1-mile mark of this hike. Stay right to continue on the main trail towards Cucamonga Peak.

3.6 Miles (7566ft)- You’ll reach the Icehouse Saddle after 3.6 miles of hiking. For many hikers, this is the final destination for their outing. For others, higher summits await. From this saddle, hikers can access Ontario Peak, Big Horn Peak, Three T’s Trail, and Cucamonga Peak. Continue heading straight away towards a rectangular placard to reach the Cucamonga Peak Trail.


The Cucamonga Peak Trail starts out with a level stretch of hiking before losing a little bit of elevation in a roller coaster fashion. The hike up until this point was covered in copious shade and tree coverage. The remaining miles are quite exposed, so make sure to stay hydrated. To the east, views of the High Desert will come into view.


4.7 Miles (7664ft)- At 4.7 miles, you’ll reach the Cucamonga Saddle. From this Saddle, you’ll see a use trail behind you that heads to Bighorn Peak. Continue straight ahead on the main trail towards Cucamonga Peak.


The last stretch of trail to Cucamonga Peak is pretty easy to follow, as it’s just a series of switchbacks that head towards the summit. Things start out with a little bit of talus and scree, so again, make sure to have proper footwear.
Looking back from the trail, you’ll have views of Bighorn and Ontario Peak, with Timber Mountain and Telegraph Peak in the background.


5.2 Miles (8224ft)- You’ll see a block off use trail here. Make sure to turn left to continue on the main trail. As you continue to gain in elevation, you get glimpses of the Inland Empire to the south.


5.7 Miles (8639ft)- You’ll see a wooden post that signifies the Etiwanda Peak junction. Head straight to remain on the path towards Cucamonga Peak. The offshoot trail to left leads towards Etiwanda Peak.
This next stretch of trail is pretty steep as there are no switchbacks. It’s just a straight shot from here to the summit.

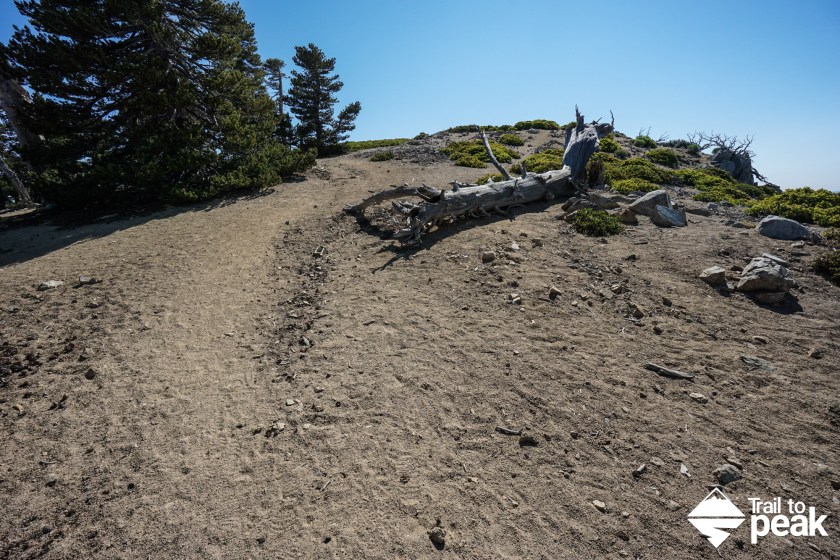
6.0 Miles (8858ft)- You’ve reached Cucamonga Peak! Once you see the views of the Inland Empire, head left towards the highest ground to reach the official summit.

At the summit, you can look east towards Etiwanda Peak, San Gorgonio, and San Jacinto. To the south you can see Santiago Peak. To the west, you can sometimes see out to the Pacific Ocean and Catalina Island.

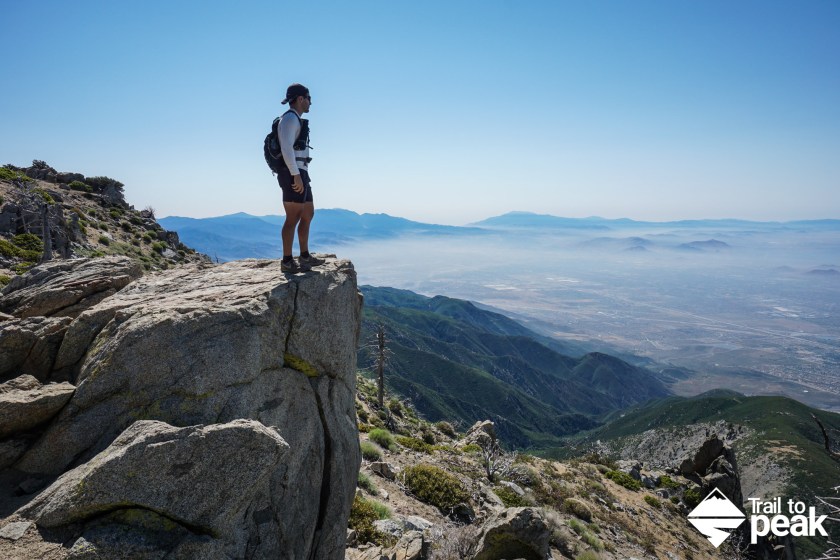
Head back down to wear you first enjoyed your summit views and you’ll see two large boulders overlooking the Inland Empire below. These are probably the most photographed rocks on Cucamonga Peak. If you’re not afraid of heights and don’t get vertigo, the make for pretty stunning photographs.

Once you’ve enjoyed enough time at the summit, you can head up the same way that you arrived. If you want to add a little distance to you downhill hike, you can try taking the Chapman Trail offshoot.
Going up, this felt longer than 6.0 miles so on the same way back down, so I decided to track the return trip. I did start/finish the same route from the Icehouse Canyon Trail. My phone read that this was 8.85 miles on the way back down, making this a 17.7 mile hike. Let me know if anyone else has official tracked it, as I have spoken to other hikers who have agreed that this hike felt longer than their usual 12 mile hike. This was still an amazing hike and I would recommend to definitely bring crampons, as I did have to use them, especially during the Cucamonga Saddle.
I’ve done this hike 30-40 times and have logged it at or around 6 miles each way every time. Icehouse Canyon can cause a lot of issues for inaccurate GPS systems. Take a close look at your GPS track and you might find a lot of “hunting” that doesn’t track your exact route.
I just hike this weekend, and my gps also said 17.80 miles. Should I get a different gps device? I have Samsun Gear S2
You do need a permit when you enter the cucamonga wilderness. You enter it about a mile into the hike in icehouse canyon. I personally never been stop to check to see if I have a permit. You can get one from Mt. Baldy ranger station